|
40th Anti-Aircraft Brigade (United Kingdom)
The 40th Anti-Aircraft Brigade was an air defence formation of Anti-Aircraft Command in the British Territorial Army (TA) formed shortly before the outbreak of the Second World War. Its initial role was to defend Royal Air Force (RAF) airfields in East Anglia. Later it commanded part of the searchlight belt protecting The Midlands. In 1944 the brigade was moved south to protect the embarkation ports for Operation Overlord and to defend against V-1 flying bombs in Operation Diver. It was briefly reformed in the postwar TA. OriginThe brigade was formed on 28 September 1938 at Boston Lodge, South Ealing in West London, under the command of Brigadier O.W. Nicholson (Territorial Army). It was part of 2nd AA Division, with the following searchlight units under command:[1][2][3][4][5]
Although the brigade's units were all from London and Middlesex, its war station was at RAF Duxford, with the searchlight detachments defending RAF stations across East Anglia.[3] Mobilisation While the brigade was forming the TA's AA units had been mobilised on 23 September 1938 during the Munich Crisis, with units manning their emergency positions within 24 hours, even though many did not yet have their full complement of men or equipment. The emergency lasted three weeks, and they were stood down on 13 October.[13] In February 1939 the existing AA defences came under the control of a new Anti-Aircraft Command. In June, as the international situation worsened, a partial mobilisation of the TA was begun in a process known as 'couverture', whereby each AA unit did a month's tour of duty in rotation to man selected AA gun and searchlight positions. On 24 August, ahead of the declaration of war, AA Command was fully mobilised at its war stations.[14] Battle of Britain and Blitz40 AA Brigade largely operated as a 'light' AA brigade composed of searchlight (S/L) and light AA gun (LAA) units. By the summer of 1940, all searchlight regiments had been transferred to the Royal Artillery (RA). As more LAA units became available, they were distributed to defend Vulnerable Points (VPs) such as factories and airfields. The S/L layouts had been based on a spacing of 3,500 yards (3,200 m), but due to equipment shortages this had been extended to 6,000 yards (5,500 m).[15] After the intense period of activity against airfields during the Battle of Britain, the German Luftwaffe switched to night raids against London and other cities (The Blitz). In November 1940 the S/L layout was changed to clusters of three lights to improve illumination, but this meant that the clusters had to be spaced 10,400 yards (9,500 m) apart. The cluster system was an attempt to improve the chances of picking up enemy bombers and keeping them illuminated for engagement by AA guns or RAF Night fighters. Eventually, one light in each cluster was to be equipped with searchlight control (SLC) radar and act as 'master light', but the radar equipment was still in short supply.[16][17][18][19] Order of Battle 1940–41By the time the Blitz ended in May 1941, 40 AA Bde's composition was as follows:[20][21][22][23][24]
Mid-War In the summer of 1941, AA Command began to receive purpose-built SLC radar in sufficient numbers to allow some S/Ls to be 'declustered' into single-light sites. These were redeployed into 'Indicator Belts' of radar-controlled S/L clusters covering approaches to the RAF's night-fighter sectors, repeated by similar belts covering AA Command's Gun Defence Areas (GDAs). Inside each belt was a 20-mile deep 'Killer Belt' of single S/Ls spaced at 6,000 yards (5,500 m) intervals in a 'Killer Belt' cooperating with night-fighters patrolling defined 'boxes'. The pattern was designed to ensure that raids penetrating deeply towards the Midlands GDAs would cross more than one belt, and the GDAs had more S/Ls at close spacing. The number of LAA units to protect Vital Points such as airfields was growing, albeit slowly.[16][34][35] At this stage of the war, experienced units were being posted away to train for service overseas. This led to a continual turnover of units, which accelerated in 1942 with the preparations for the invasion of North Africa (Operation Torch) and the need to transfer LAA units to counter the Luftwaffe's hit-and-run attacks against South Coast towns that began in March 1942. By May 1942 the brigade only had two units under command (36th and 64th S/L Rgts), but newly formed units continued to join AA Command, the HAA and support units increasingly becoming 'Mixed' units, indicating that women of the Auxiliary Territorial Service (ATS) were fully integrated into them.[16][35][36] Order of Battle 1941–43During this period the brigade's composition was as follows (temporary attachments omitted):[37][38][39][40][41] 
Later WarIn 1942 AA Command abolished its hierarchy of divisions and corps, and established a single tier of AA Groups; corresponding to the Groups of RAF Fighter Command. 40 AA Bde came under 5 AA Group based at Nottingham and affiliated to No. 12 Group RAF.[16][46][39] During the summer of 1943, the last of 40 AA Bde's units were transferred away. In November the brigade HQ was given a complete new roster of AA gun units to command, and in January 1944 it was transferred to 2 AA Group.[41] This formation in Southern and South-Eastern England was responsible for defending the assembly camps, depots and embarkation ports for the forthcoming Allied invasion of Normandy (Operation Overlord). In November 1943 it was also ordered to plan for the expected onslaught of V-1 flying bombs (codenamed 'Divers') against London, to which it responded by planning a thick belt of 8-gun HAA positions across the likely flight path, backed by LAA guns. Meanwhile, 2 AA Group had to deal with a sharp increase in Luftwaffe air raids trying to reach London during the winter of 1943–4 (the so-called 'Little Blitz').[16][47] Order of Battle 1943–44During this period the brigade was constituted as follows:[41][48]
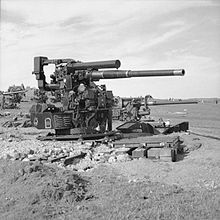
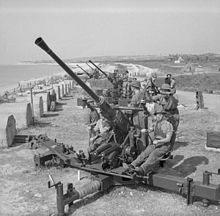
Operation DiverAA Command relieved the burden on 2 AA Group by bringing down 6 AA Group HQ from Scotland and giving it responsibility for the Overlord ports in the Solent–Portsmouth area. 40 AA Brigade and some of its regiments transferred to 6 AA Group in May 1944.[49] The first V-1 missiles were fired against London in June, a week after D-Day, and Operation Diver was activated. 2 AA Group's HAA batteries left their 'Overlord' sites and moved to pre-planned sites across the 'funnel' of V-1 flightpaths. 40 AA Brigade was one of four reinforcing brigades moved into the area within two weeks. However, the results were disappointing, and after a fortnight AA Command changed its tactics. Firstly, mobile HAA guns were replaced with static installations that could traverse more quickly to track the fast-moving targets. These were emplaced on temporary 'Pile platforms' named after the Commander-in-Chief of AA Command, Gen Sir Frederick 'Tim' Pile. Secondly, the HAA gun belt was moved to the coast and interlaced with LAA guns to hit the missiles out to sea. This new belt was divided into six brigade sectors, with 40 AA Bde HQ taking charge of one. The whole process involved the movement of hundreds of guns and vehicles and thousands of servicemen and women, but a new 8-gun site could be established in 48 hours. The guns were constantly in action, and the success rate against the 'Divers' steadily improved, until over 50 per cent of incoming missiles were destroyed by gunfire or fighter aircraft. This phase of Operation Diver ended in September after the V-1 launch sites in Northern France had been overrun by 21st Army Group.[16][50][51][52] Order of Battle Summer 1944  During this period the brigade was constituted as follows:[48]
Operation Diver Phase 2 A new phase of the V-1 offensive began in the second half of September 1944 when the Luftwaffe began launching V-1s from aircraft flying over the North Sea. Once again, AA Command had to redeploy its guns. In October, 40 AA Bde was transferred to 1 AA Group, which controlled the 'Diver Box' defences over the outer Thames Estuary, and divided the coastline from Chatham, Kent, to Great Yarmouth into 10 sectors, each under a brigade HQ. This time the wholesale movement of guns, platforms, personnel and huts fell into chaos as the staff work of the AA groups and brigades fell apart, earning a stinging rebuke from Gen Pile. The responsibilities proved too large for one group HQ, and a new 9 AA Group was formed to take command of the Diver defences on the coast of East Anglia, including 40 AA Bde.[16][48][50][53] Order of Battle 1944–45 The composition of the brigade during the period was as follows:[48]
By October 1944, the brigade's HQ establishment was 14 officers, 30 male other ranks and 5 members of the ATS, together with a small number of attached drivers, cooks and mess orderlies (male and female). In addition, the brigade had a Mixed Signal Office Section of 5 male other ranks and 19 ATS, which was formally part of the Group signal unit.[54] War's endAs the war in Europe drew to its end in early 1945, 9 AA Group was disbanded, and 40 AA Bde reverted to the command of 2 AA Group. demobilisation of AA Command proceeded rapidly as manpower was diverted to other roles. After VE day 40 AA Bde was reduced to commanding two of its former units (128th and 136th HAA Rgts), together with 2nd HAA Rgt, a Regular Army unit returned from Middle East Forces.[48][55][56] By September 1945, 40 AA Bde HQ reported directly to AA Command and commanded two 'Area AA Maintenance HQs' (4 and 14), and an ordnance depot at Kincardine in Scotland. It was then rejoined in October and November by 128th and 136th HAA Rgts, and by 14th (West Lothian, Royal Scots) LAA Rgt. In April 1946, these regiments were disbanded[44][57] and replaced in 40 AA Bde by the reformed 3rd and 5th HAA Rgts, which were Regular Army units that had been lost at the fall of Singapore and Hong Kong respectively in 1941–42.[44][48][58][59] PostwarWhen the TA was reorganised on 1 January 1947, 40 AA Bde was redesignated 66 AA Bde,[a] with its HQ at RAF Coltishall and constituting part of 5 AA Group in Nottingham. It had the following units under command:[1][60][61][62]
After AA Command was abolished on 10 March 1955, 66 AA Bde was placed in suspended animation on 31 October that year, and formally disbanded on 28 September 1948.[1][60] Footnotes
Notes
References
Online sources |
||||||||||||||||||