|
Operation Excess
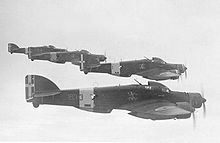
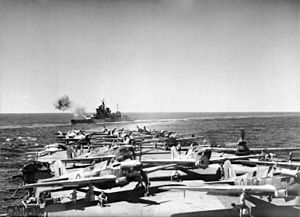
Operation Excess was a series of British supply convoys to Malta, Alexandria and Greece in January 1941. The operation was the first to encounter Luftwaffe anti-shipping aircraft over the Mediterranean Sea. All the convoyed freighters reached their destinations. The destroyer Gallant was disabled by Italian mines and Axis bombers severely damaged the cruiser Southampton and the aircraft carrier Illustrious. BackgroundItaly's declaration of War on 10 June 1940 brought the Second World War to the Mediterranean Sea and placed the Regia Aeronautica astride the traditional British sea route to Indian Ocean ports, while the Regia Marina roughly tripled the numbers of battleships, cruisers and submarines available to challenge British sea power. The Royal Navy had held the eastern Mediterranean and France the western Mediterranean but the Second Armistice at Compiègne removed the French navy from the alliance on 25 June 1940. From bases at Gibraltar and Alexandria, the Royal Navy attempted to convoy supplies to Malta to maintain it as a base in the central Mediterranean. As Italy attacked Egypt from Libya in September 1940 and Greece from Albania in October 1940, the Royal Navy maintained most of their Mediterranean Fleet at Alexandria and used Force H at Gibraltar for raids. British successes in early November 1940, including halting the Italian offensive in Greece and disabling Italian battleships Littorio, Conte di Cavour and Duilio at the Battle of Taranto, provided incentive and opportunity to supply Malta and Greece.[1] PreludeAlliedConvoy MC 4 consisted of four freighters at Gibraltar; Clan Cumming, Clan MacDonald and Empire Song carried materiel destined for Piraeus. Essex carried 3,000 long tons (3,000 t) of seed potatoes, 4,000 long tons (4,100 t) of ammunition and twelve crated Hawker Hurricanes for Malta.[2] Convoy MW 5 consisted of the Freighters Breconshire and Clan Macaulay at Alexandria with cargo bound for Malta.[3] Convoy ME 6 was made up of nine freighters waited at Malta for passage to Alexandria.[3] Force A comprised HMS Warspite, Valiant, Nubian, Mohawk, Dainty, Gallant, Greyhound, Griffin, Jervis and Illustrious to sail from Alexandria, covering convoys MC 4, MW 5 and ME 6 east of the Skerki Banks.[2] Force B of HMS Gloucester, Southampton, Ilex and Janus[2] would carry five hundred soldiers and airmen from the Aegean to Malta and join convoy MC 4 after dropping their passengers in Malta.[4] Force C was to screen Convoy MW 5 with HMS Calcutta, Defender and Diamond.[2] Force D, HMS York and Orion, was to sail from Alexandria with Flower-class corvettes Gloxinia, Peony, Hyacinth, Salvia and the replenishment oiler Brambleleaf to be joined by HMS Ajax and HMAS Perth from Souda Bay.[2] Force F was to cover Convoy MC 4 with HMS Jaguar, Hero, Hasty, Hereward and Bonaventure carrying four hundred soldiers and airmen to Malta.[2][4] Force H was to protect Convoy MC 4 from Gibraltar to the Skerki Banks with HMS Malaya, Renown, Sheffield, Faulknor, Fury, Forester, Fortune, Firedrake and Ark Royal ferrying six Fairey Swordfish for Malta.[2] AxisFive hundred anti-shipping aircraft of Fliegerkorps X were being transferred from Norway to Sicily to protect Axis convoys to North Africa and prevent passage of British convoys to Malta.[1] Operations6 January 1941 Convoy MC 4 left Gibraltar, feinting toward the Atlantic, before turning toward Malta after dark, to mislead Axis agents near Gibraltar.[4] 7 JanuaryForce H sailed from Gibraltar to cover convoy MC 4. Force A, Force D and convoy MW 5 with Force C sailed from Alexandria and Force B sailed from the Aegean toward Malta.[3] Force A was located by Italian air reconnaissance that afternoon.[2] 8 JanuaryForce B landed its passengers in Malta and proceeded west to meet convoy MC 4.[2] Wellington bombers raided Naples damaging Giulio Cesare with three near misses and causing the only operational Italian battleship, Vittorio Veneto, to retreat from the approaching convoys.[4][1] 9 JanuaryForce A was joined by Force D and HMAS Sydney 210 nmi (240 mi; 390 km) south-east of Malta, Force B joined convoy MC 4; Convoy MC 4 and Force H were discovered by Italian aircraft and attacked by ten SM.79s from Sardinia. Two SM.79s were shot down by Fairey Fulmars from Ark Royal and a later attack by 15 Fiat CR.42 Falcos carrying 220 lb (100 kg) bombs also failed. Force H left convoy MC 4 that afternoon after Ark Royal launched six Swordfish for the defence of Malta; Force A joined convoy MC 4 at dusk.[4] 10 January Italian ships from La Spezia failed to find Force H.[1] The Italian submarine Ruggiero Settimo and torpedo boats Circe and Vega (under the command of Commander Giuseppe Fontana) launched torpedoes against Convoy MC 4 but missed.[2] Bonaventure and Hereward sank Vega 6 nmi (11 km; 6.9 mi) south of Pantellaria at 08:30 and Circe escaped undamaged. Bonaventure was slightly damaged and two men killed; 75 per cent of her ammunition was expended in the engagement.[6] Two of Vega's crew survived.[7] Right after the engagement, which pushed the British convoy too far south of their route, Gallant struck a naval mine at 08:35.[8] Mohawk took Gallant in tow toward Malta while the Force B cruisers provided protection from air attacks.[5] Convoys MC 4 and MW 5 arrived at Malta and convoy ME 6 departed for Alexandria.[3] Fulmars from Illustrious shot down an Italian aircraft shadowing Force A at 09:30. Valiant avoided torpedoes launched by two SM.79s approaching under the radar horizon at 12:30.[5] As the combat air patrol Fulmars dropped altitude to engage the SM.79s, Force A was attacked at 12:35 by 18 He 111s of KG 26 and 43 Ju 87s of StG 1 and StG 2 escorted by 10 Bf 110s of ZG 26.[2][9] Illustrious completed launching Fulmar and Swordfish patrol aircraft as the attack developed. Illustrious was the main target and was enveloped in waterspouts and mist of exploding bombs. Some bombers diving from an altitude of 12,000 feet delayed bomb release until they pulled-out lower than the height of Illustrious' funnel. The five air patrol Fulmars had not returned from chasing the SM.79s which attacked Valiant and the four recently launched Fulmars were unable to gain altitude rapidly enough to break up the attack. The Fulmars claimed eight enemy aircraft during the bombing of Force A as they shuttled to Malta airfields to refuel and re-arm.[5] Warspite was lightly damaged by a bomb.[10] Illustrious was hit by five bombs, including one which failed to explode and a near miss disabled her rudder mechanism. A bomb striking a lowered elevator caused extensive hangar damage, with many casualties among aircraft maintenance personnel, nine Swordfish and five Fulmars destroyed. At 15:30 Illustrious headed for Malta steering with engines. The bombing attacks continued. Seven SM.79s were discouraged by heavy anti-aircraft fire but an attack by six Italian Ju 87s at 16:00 scored another bomb hit and two near misses. Fourteen German Ju 87s missed Valiant and Janus and a later attack by 14 He 111s was similarly ineffective. Illustrious reached Malta at 21:30 and would suffer 126 dead and 91 wounded by the time she departed from Malta.[4] 11 JanuaryGallant was beached in Malta's Grand Harbor at dawn and never repaired.[5][7] As Mohawk and the Force B cruisers steamed from Malta to rejoin Force A, they were surprised by 12 Ju 87R dive bombers of II/St.G.2 attacking out of the sun at 15:20.[11][12] Gloucester was hit by a bomb which failed to explode and Southampton was hit by two bombs, which killed eighty men and started fires, requiring the ship to be scuttled 180 nmi (210 mi; 330 km) east of Malta.[7] Force H returned to Gibraltar.[2] 12 JanuaryForce A was reinforced west of Crete by Force B, the cruisers of Force D, the battleship HMS Barham and the aircraft carrier Eagle from Alexandria.[2] 13 JanuaryConvoy ME 6 arrived at Alexandria.[3] The Illustrious blitzWhat Maltese called the Illustrious Blitz began when bomb stocks depleted during the attacks of 10 and 11 January were replenished and the Axis made a maximum effort to destroy Illustrious before she could be repaired. Illustrious and Essex were hit during an air raid on 16 January. Ten Macchi C.202s, ten CR.42s and twenty Bf 110s escorted 44 Ju 87s. Bombs exploding in Grand Harbour killed numerous fish, that were collected after the raid and eaten.[4] Illustrious was not seriously damaged but a bomb exploded in Essex's engine room killing 15 men and wounding 23 more.[5] There was another heavy air raid on 17 January and Illustrious was again hit in an air raid on 18 January.[4][5] Illustrious was not damaged by the last big attack on 19 January.[4] Illustrious departed Malta on 23 January but her Fulmars remained for the defence of the island.[1] Illustrious was able to complete additional repairs after reaching Alexandria on 25 January but restoration of full combat effectiveness required a trip to United States shipyards.[4][13] LossesFairey Fulmar fighters and AA gunners of the Royal Navy shot down at least seven aircraft on 10 January 1941, in defence of Illustrious, while one Fulmar was lost.[a] No merchantmen were lost during Excess but the Royal Navy lost one cruiser sunk and a destroyer damaged beyond repair.[14] See alsoNotes
Footnotes
References
Further reading
|
||||||||||||||||||||||||||
